

Feb 9, 2012
There isn't a lot of information in the Rumpus documentation about the Web "Extra" function, but it's a flexible and useful workflow automation tool, so it's worth a look. Essentially, the extra function allows you to create a custom action that users can apply to files on the system. For example, you could use the extra function to...
allow users to rename files, or move them to a specific folder.
let users "sign off" on proofs, or select files for final processing.
move selected files to an archive.
ask a question or provide feedback about specific files.
Let's start with a simple example, where a user needs to be able to accept final proofs for production. We'll follow that with an example of using the extra function to rename files.
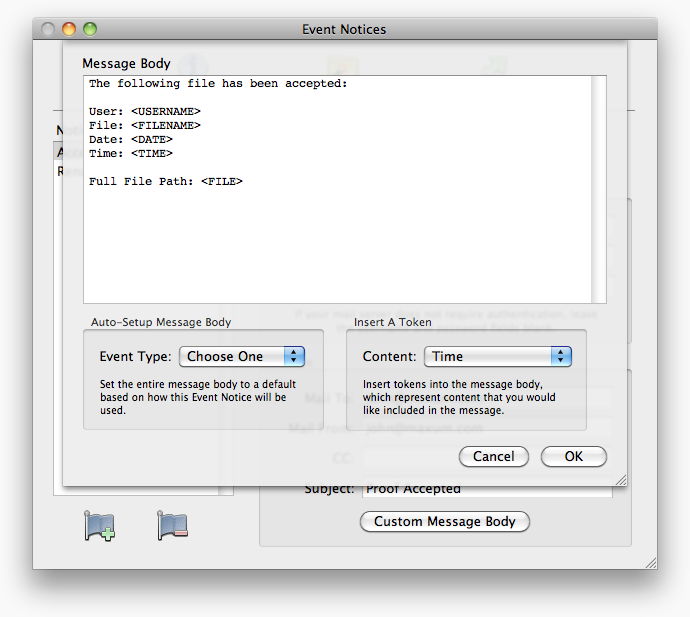
When a user accepts a proof, we'll have Rumpus send an e-mail, letting us know that the file has been accepted. So the first thing to do is create an Event Notice, with a normal setup to send a designated person an e-mail and a message body that might look something like this:
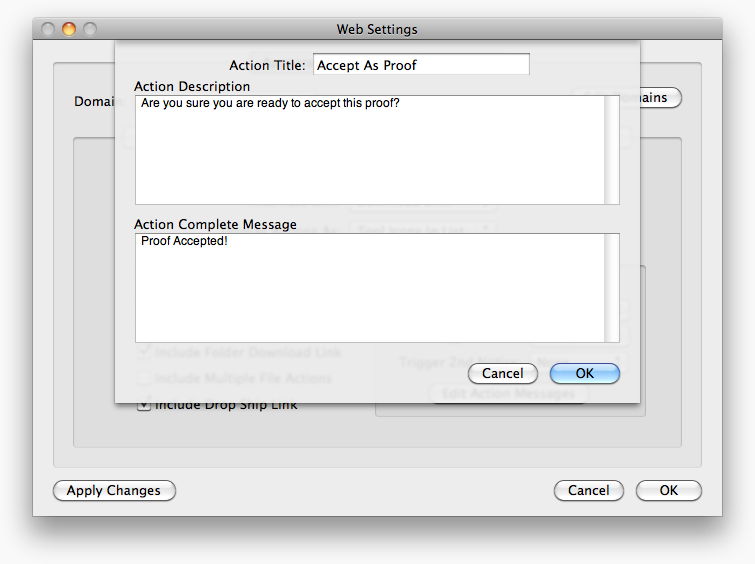
Next, open the Web Settings window and flip to the "Actions" tab. Enable the "Extra" function and select the Event Notice you just created as the "Trigger Notice". Click the "Edit Action Messages" button and set the message text areas to something like this:
When a user logs in via the WFM, there will be a new option available for each file. In standard view, a gear icon (a generic icon representing "process this file") will be shown, and in thumbnail view or when an action menu is shown, the "Action Title" will now be listed as an option.
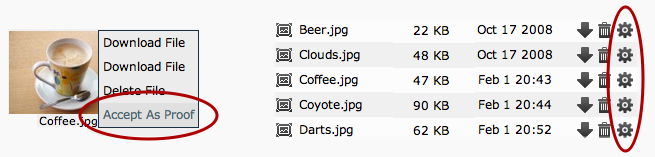
To accept the proof, the user selects "Accept As Proof" from the menu or clicks the gear icon. They will then be presented with a box asking them to confirm the action.
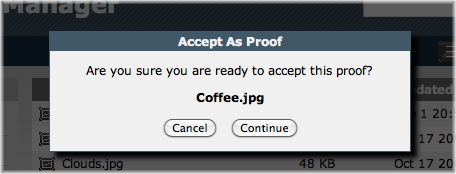
When the user confirms the action, the e-mail message will be sent, as defined in the Event Notice, confirming acceptance of the proof.
This basic system could be expanded in several ways. To add an extra check, create an Upload Center form with a checkbox field labeled "check here to confirm acceptance of this proof", and then add that field to the Event Notice message body as confirmation. You could also add a pop-up menu to the Upload Center form, allowing the user to select among various sales representatives or other people in your organization. The Event Notice "Mail To" or "CC" fields can then be set with a "FORMVAR" token so that the appropriate person receives the acceptance notice. You might also create a second Event Notice, perhaps using a shell script that copies the file to a specific "accepted" folder on the server, improving workflow by automatically copying accepted files to a work folder on your system.
Our second example will show how to create a simple "file rename" function. In this case, let's start with the Upload Center form, which will prompt the user for the new filename.
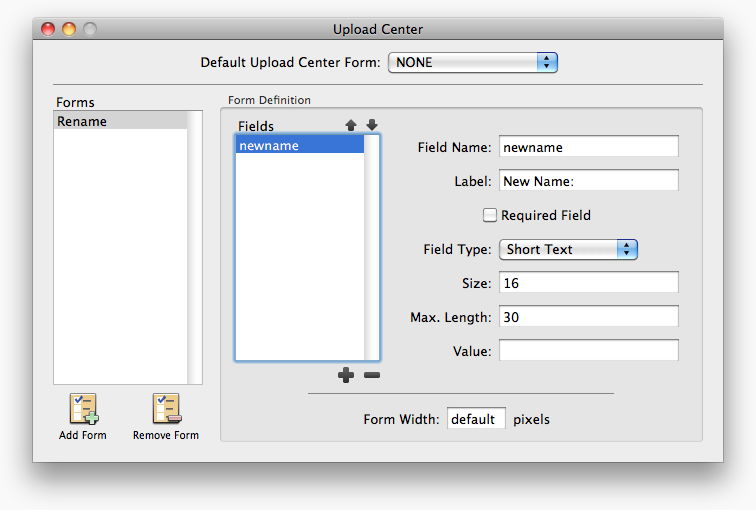
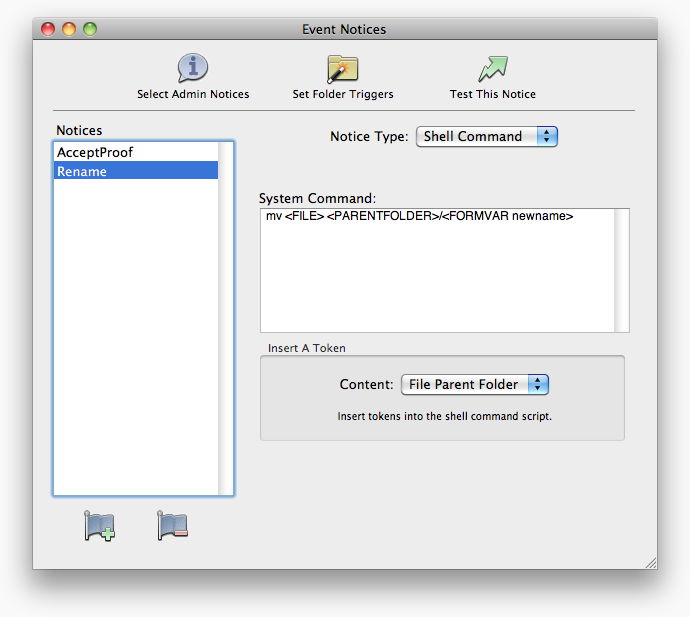
Next, we'll need an Event Notice that executes a shell script to move the file from the current file path to a file in the same folder, with the new name.
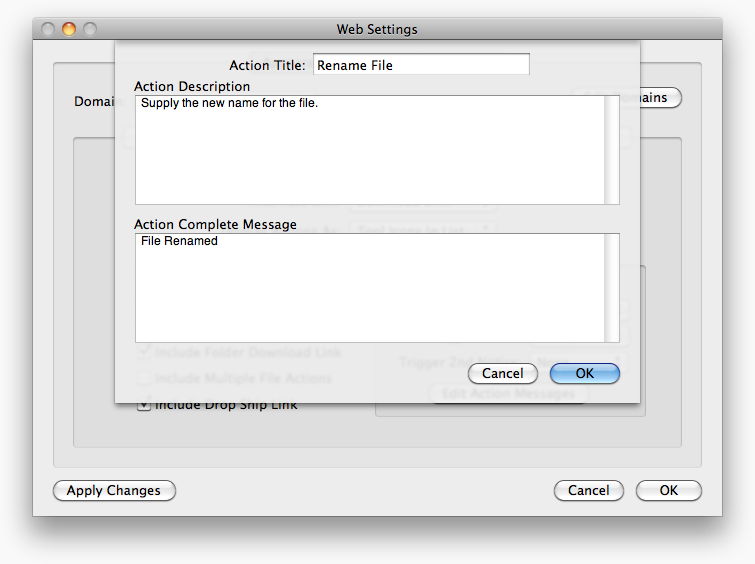
As in the first example, open the Web Settings window, flip to the "Actions" tab, enable the "Extra" function and select the "Upload Center Form" and "Trigger Notice" that we just created. Click "Edit Action Messages", and set the text prompts like this:
When users view the WFM directory listing, the gear icon (or "Rename File" menu option), will now bring up a box that looks like this:
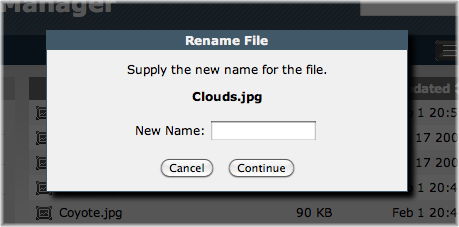
The user can then supply a new filename and perform a rename as expected.
Rather than prompting a user for a new filename, you could instead eliminate the form and change the script a little so that the file is moved to an archive folder or renamed in a specific way (like with a time/date stamp) to automate a workflow. Or you could allow users to select from a pop-up menu defined in the Upload Center form that allows a selection among several pre-determined folders where the file can be moved. The "Extra" function provides a lot of flexibility that allows you to improve workflow based on the needs of your organization.