

July 20, 2022
Having Rumpus send mail via your Office365 account isn't difficult, but there are a couple of things worth pointing out, so let's take a short step-by-step walk through of the process.
Modern Internet practices continue to evolve, and Microsoft and other software and service providers are constantly updating their security policies. Maxum keeps Rumpus up to date with current requirements, but older versions of Rumpus may not be compatible with protocols updated since those older versions were released. If you are having trouble with SMTP or any other Rumpus component, the first thing to do is to upgrade to the latest Rumpus release. Because standards continue to evolve over time, it isn't possible for Maxum to provide support for out-of-date software.
The place to begin with mail settings in Rumpus is the Network Settings window, E-Mail tab. Shown here is a typical and correct SMTP setup for the "support@maxum.com" account using Office365.
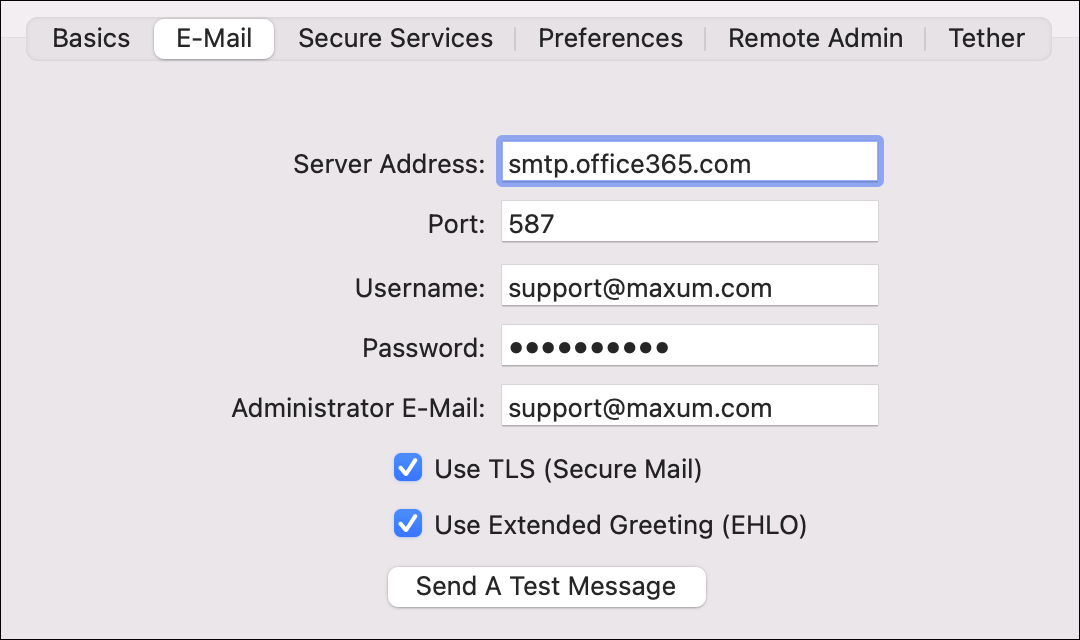
Your SMTP settings will be the same, except for the "Username", "Password" and "Administrator E-Mail" fields. Set the "Administrator E-Mail" address to your own e-mail address, and set the "Username" and "Password" to the Office365 address and password of the mail account you wish to use for sending mail.
Click the "Send A Test Message" button, which will send an e-mail to the specified administrator e-mail address using the settings you have entered. If the response indicates that the message was successfully sent, check your e-mail to confirm receipt. If an error message is displayed, read the message carefully. The test function has been carefully designed to provide meaningful feedback to diagnose any settings error.
If you are unable to get the test function to send the test e-mail correctly, send a screen shot of the e-mail settings and the resulting error message to "support@maxum.com" and we can assist with diagnosing the problem.
Some mail-sending functions of Rumpus don't require an Event Notice, in which case your SMTP setup is complete. However, some functions provide more flexibility, allowing you to specify alternate message recipients, different messages, and so on. When creating a new E-Mail Event Notice, Rumpus will automatically populate the Event Notice setup based on your Network Settings, but there are a couple of additional considerations to be aware of.
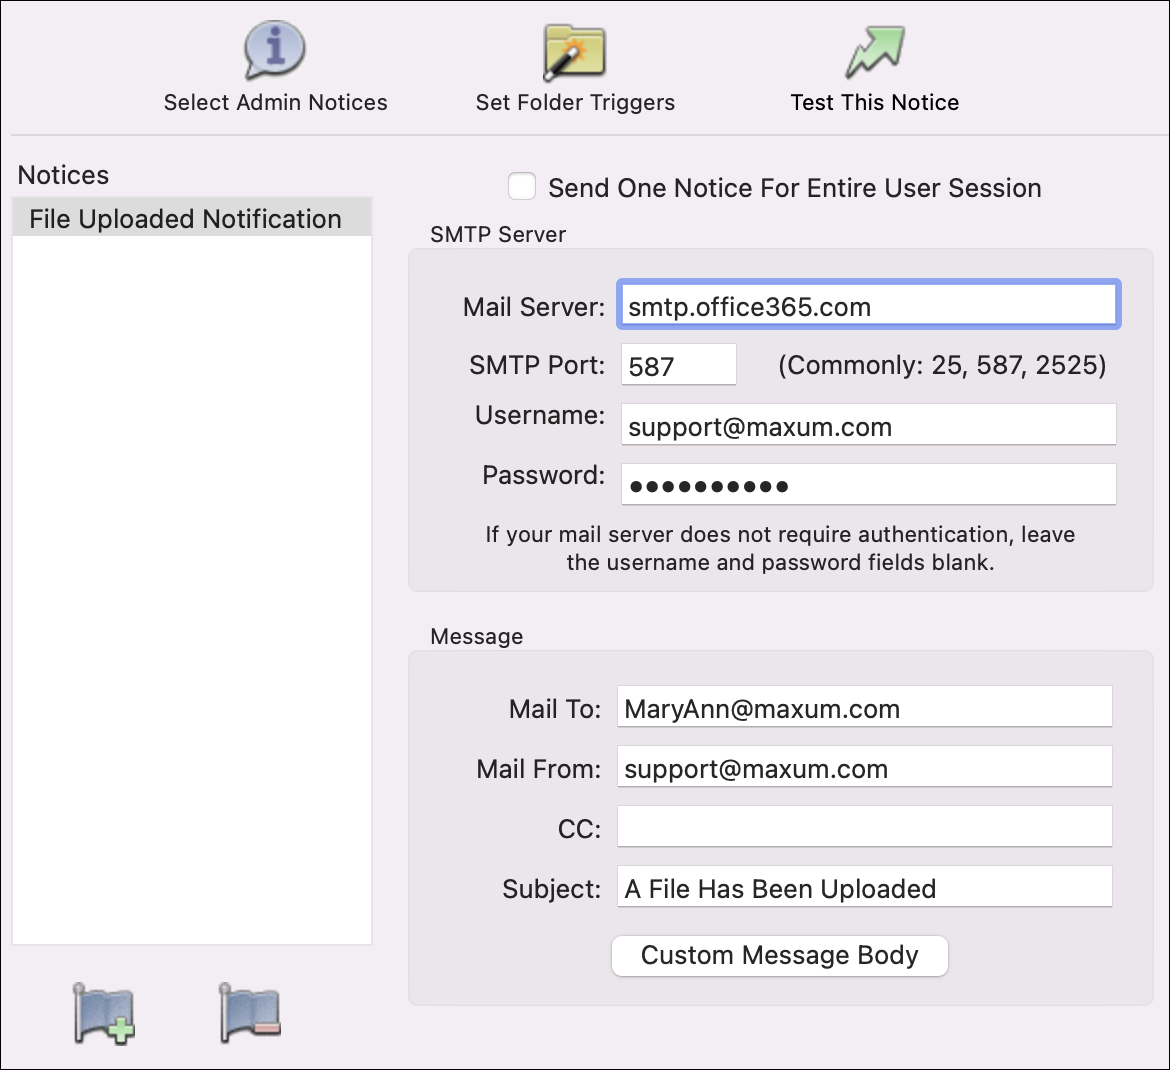
The first detail to note is that Office365 requires that e-mail messages be sent "From" the same account used to send the message. In other words, the "Username" and "Mail From" fields must be exactly the same, the address of the Office365 account being used to send the mail. In some cases, for example when sending Drop Ship notifications, Rumpus can adjust the "Mail From" address to the address of the person causing the e-mail to be sent. When this is required, be sure to supply both the e-mail address and the e-mail password of the user's Office365 mail account on the User Accounts window in Rumpus.
Also note that some mail settings, most notably the "Use TLS" option, are not available on the Event Notice setup. The "Use TLS" and other options defined on the Network Settings window are global, and apply to all SMTP connections made by Rumpus. So, as long as the mail settings on the Network Settings window function correctly, your Event Notices should work as expected as well.
As always, if you have trouble, send mail to support@maxum.com. Be sure to include details, especially the entire test e-mail result message, which is always the best way to diagnose mail problems.